1
How to make a slouchy beanie
Posted by anjj
on
Thursday, April 08, 2010
in
Tutorial
So Anjj wanted to make a beanie for a long while (and a tutorial too!!!) and even bought fabric for it, but never really got the time for it. But today Wan came (to get her glasses she forgot last time XD) and we decided to make a tutorial for it =D we know how hard it is to find the perfect beanie!

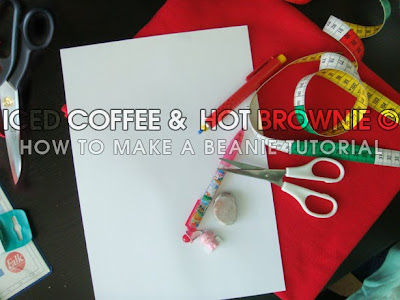
Things you need:
● pencil
● paper
● scissors
● ruler
● fabric!
● pencil for fabric
● scissors for fabric
● sewing machine or sewing kit

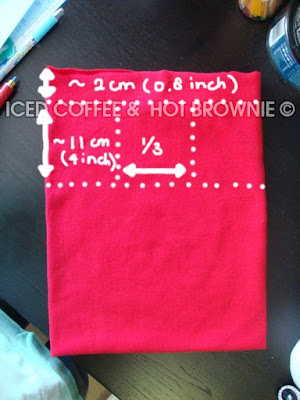
We used "band fabric", I don't know how it's exactly called in English. I think it's called sweater knit fabric, it's the fabric you use for the ending of the sleeves from sweaters. You could also use knitted fabric, which would be even better! Our fabric is round (see next picture), but if yours isn't just sew the endings together in step five after cutting the figures. We also folded ours double (above picture), so we won't have to stitch the bottom.
BTW; the full length of our fabric (folded) is 35cm (14inch).
BTW; the full length of our fabric (folded) is 35cm (14inch).

Step one; Measure 2cm from the top down (this is for the seam) and draw a line with your fabric pencil. Then measure down approximately 11cm down from this line and draw another line. The measure the width of the fabric.
NOTICE; if you measure the full length of the fabric, measure 1/6. If you measure half of the fabric (like I did) you will have to measure 1/3.
NOTICE; if you measure the full length of the fabric, measure 1/6. If you measure half of the fabric (like I did) you will have to measure 1/3.

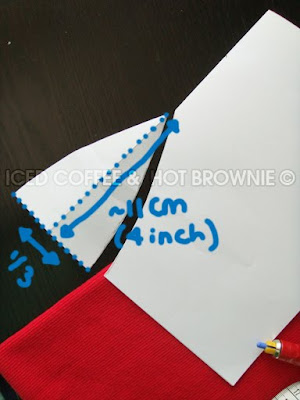
Step two; Now draw a figure on your paper like the one on the picture. Again, use the 1/3 measurement if you measured half of the fabric and 1/6 if you measured the full width of the fabric. If you find it hard to draw, just fold the paper (like I did) and draw half the figure. Cut out along the lines.
NOTICE; if you fold your paper, use 1/2 of your measurements!

Step three; Now put the paper on your fabric between the lines you drew earlier and draw lines (with your fabric pencil) around the figure you cut out. If you aren't a great sewer, draw the lines 0.5~1cm (0.2~0.4inch) next to the figure.

Step four; Cut the fabric with your fabric scissors along the lines.

Step five; Now sew the sides of the figures to the side of the one next to it. It's best to use a zigzagging stitch, because these are the most secure.

Now you're done! If you have an opening in the middle or when your beanie is too pointy, just stitch a bit beneath the top.
TIPS;
● dare to use colours!
● with any prints on it
● use wool or knitted fabrics
● add a pom pom :3
● or ears :D
● use a wider width and longer length for a 'baggier' beanie

HOPE YOU LIKED OUR TUTORIAL =D